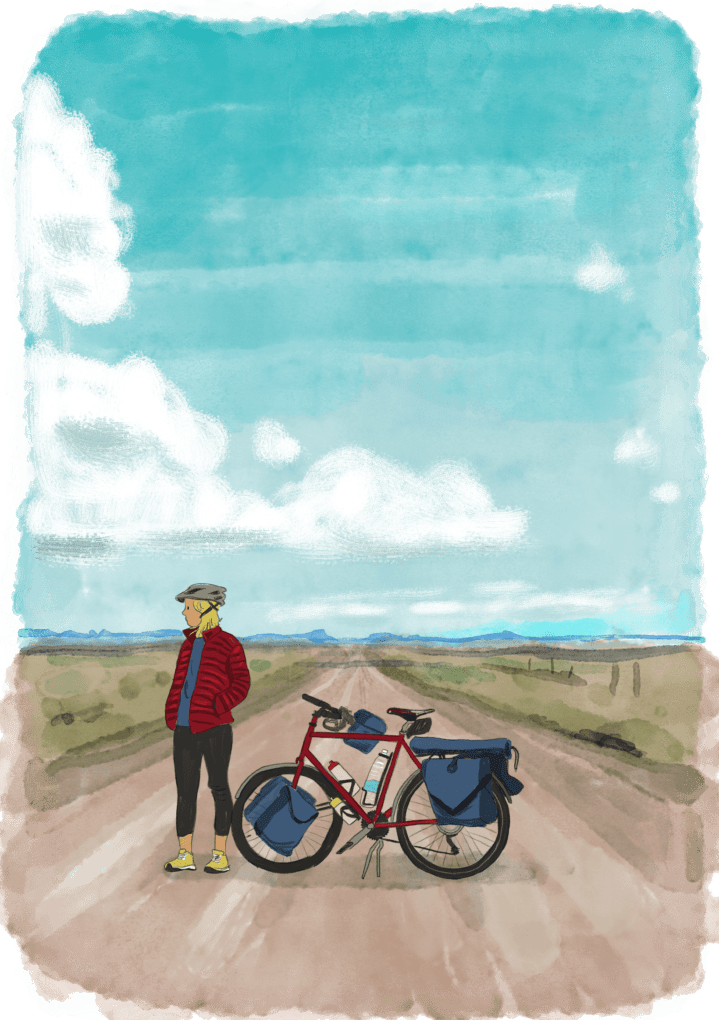
Big bike trips are attracting more and more motivated people who want to travel into the unknown all alone. You might think it’s easy to set off on a bike, however, you need to be even more prepared than for a classic trip. In this article, you’ll find all the key information you need to know so that you can embark on this adventure.
In 2021, Matilda and Peyman set off on the adventure of a lifetime, cycling around the world indefinitely. On arrival in Gambia, in Africa, they gave a very detailed and interesting interview. They deal with all sorts of subjects: the difficulties of travelling on bike, the dangers, where to sleep, the gear, the type of encounters with others, and lots more things… Some of their answers will surprise you!
This video is a great starting point to find out about long-distance bike trips.
Follow them on their website: Nomad’s Trails
The initial investment in a long cycling trip is quite significant. In fact, you need to buy a good, sturdy bike that isn’t too heavy as well as good-quality equipment, a number of accessories, tools, usually some camping gear and even some clothing that is specifically designed for cycling.
However, after that, you’re independent and you save a lot in comparison to other ways of travelling. In addition, you can get away with carrying much more than with a classic backpack.
Aside from the environmental impact of manufacturing a bike, importing it and changing its parts, it’s totally non-polluting. If you want to reduce this impact even more, you can choose a bike that was manufactured in your home country.
Needless to say, doing a million pedal strokes keeps you in good physical shape, even if it does give you funny tan lines.
Cycling allows you to venture to different terrains that aren’t always accessible to other means of transport. Of course you can cycle on roads, but also off-road, on trails, on flat surfaces, up hills, on soil or even ice… However, you really need to make sure you have the correct emergency equipment and the necessary mechanical knowledge as problems will inevitably arise, sometimes in the most remote areas.
You’re totally independent and free to go to the most remote places, where public transport doesn’t even go. Freeing yourself from public transport and its schedules gives an amazing sense of freedom. On a bike, you can go almost anywhere, anytime.
This is the major advantage of cycling. It’s a slow way of travelling that lets you appreciate landscapes and cultures even more. You can stop where and when you want, where you wouldn’t normally stop in other situations. You’re sure to get off the beaten track. You’re more open to meet the locals, more open to spontaneous invitations, and you attract the curiosity and sympathy of local residents more easily.
It’s difficult to imagine such a trip and everything that it may involve.
You need to be aware of the difficulties and anticipate them. Expect physical pain, mechanical problems, to sometimes feel lonely, and maybe to be robbed. It’s really important to compare your dream with other bike-travellers’ experiences. Look at their specialist blogs, meet up with those who live near you, read their travel stories… There are as many trips as there are travellers. If you plan yours well by taking inspiration from others, you’ll feel much more at ease.
Physically, you don’t have to be a great athlete to consider doing a long bike trip. It’s enough to be fit and healthy. You have to pedal at your own pace. As you go through the stages, you rack up more kilometres, your muscles strengthen and it becomes easier.
However, more to test your own motivation than to pump up your muscles, nothing beats a few weeks’ test trip in real conditions, that is, with the same amount of luggage, the same equipment and a bike as close as possible to the one you plan on having for the big trip. It’s advised to develop consistency by pedalling every day, then giving yourself a few days rest. In this way, the mind and the body get used to it and setting off is smooth, like a routine.

Working out like Rocky isn’t necessary
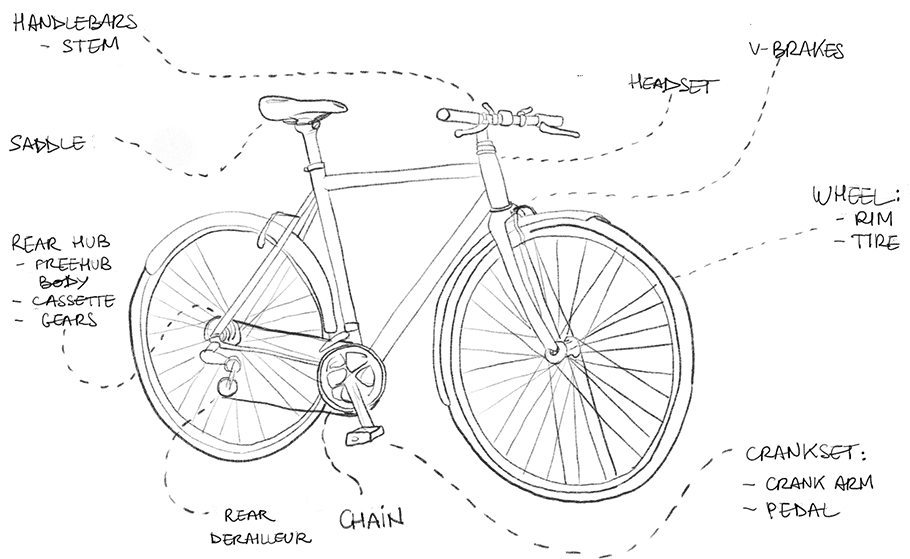
When you go far away and for a long time, you must know every part, and every nut and bolt of your bike. It’s essential to be able to maintain your bike and fix the thousand and one breakdowns and breakages that’ll inevitably happen one day or another.
Fortunately, a bike isn’t a spaceship and anyone can become an expert mechanic.
The best way to learn is to enrol in a participatory bike-repair workshop. They promote the upcycle and reuse of bikes and offer mechanical courses. To find somewhere near you that holds events and workshops on how to repair your bike, simply Google it. In just a few clicks, you’ll find all sorts of options.
For example, the volunteer-led Davis Bike Collective in California have all the knowledge and gear to help you repair your own bike.
What’s more, nowadays, there are also plenty of YouTubers who upload bicycle maintenance and repair videos. You can easily subscribe to their channels and watch their videos for free. Some of the best ones out there include:

It’s vital to know each part of your bike
This is the keen bike-traveller who seeks independence and life in the wilderness. So, they’ll take all the necessary camping equipment. For them, the trip will be more economical as accommodation will cost them nothing (as they’ll stay in nature or in a garden) and they’ll cook their meals themself with a little camping stove. They may face some difficulties when they need to go somewhere on foot, as they can’t always keep an eye on their bike.
More often than not, this cyclist stops at small hotels and youth hostels. The trip is generally easier and more comfortable, but also more expensive. It’s better for them to plan the stages, because they need to stop somewhere where they’ll find accommodation for the night. As they’re not carrying camping gear, they can travel more lightly.
In theory, it’s unusual for a frequent bike-traveller to go without a tent, even if they know that they’ll spend most of their nights in a hostel. On a bike, you can afford to carry a few extra pounds.
If you’re going far away and for a long time, your bike needs to be comfortable, sturdy, and as easy to repair and maintain as possible. But above all, the right bike to travel with is a bike that’s to your liking, adapted to you and your way of travelling, and within your means.
Bear in mind that there are specialist bicycle mechanics who can offer to build you a custom bike. You’ll have to pay a hefty amount of money, but it’s worth every penny as you’ll have the perfect bike.

The mountain bike is designed for the roughest off-road terrain. It has a solid frame, a telescopic fork and very wide wheels. You’ll be able to adapt your mountain bike to a long trip if you know that you’re going to go on rough terrains or if you already have a mountain bike and you want to save on the purchase of a mount. The position on this bike is very inclined and sporty. However, the position can be raised for comfort with a multi-position stem and a multi-position handlebar.
However, all of these adjustments end up being almost as expensive as buying a real touring bike.
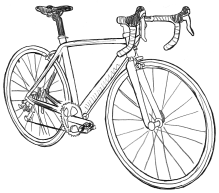
These bikes are designed for performance and speed. They’re very fragile, uncomfortable for long distances, difficult to adjust, etc.
You can’t even put wider wheels on them. However, you can still fit a trailer on the back of the bike.
In short, you’ll only use this bike on a trip for economic reasons and / or if you don’t plan on going off-road.
This is the vintage, old school bicycle for bike trips. Historically, it’s the first kind of bike that was specifically created for bicycle touring. It’s actually a sturdier, more adaptable and travel-accessorised racing bike. Therefore, the position on the bike is tilted and sporty, and the handlebars have the racer style.
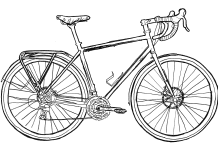
As its name suggests, this bike is designed for touring. It’s the modern version of the old school touring bike.
Its shape is designed for comfort, sturdiness and versatility on all terrains. The position is a lot more raised, more comfortable, it has rolling tyres and is also suitable for rough terrains. It comes with eyelets everywhere so you can attach accessories. The bike parts are, from the outset, compatible with touring. A compromise between simplicity (replaceable and easily fixable) and high quality (sturdiness and lightweight).
Recently, a new community of travellers have taken to the road with their folding bikes. It’s easy to take on transport, if needed, and really handy in cities. You can bring it into an apartment. In short, it doesn’t get in the way.
But the folding bike isn’t limited to cities and roads, you can now take them on mountain bike trails. For example, the Paratrooper model from Montague is indeed a folding mountain bike.

The fat bike is an extreme mountain bike made for extremely rugged terrain and can ride on snow, sand or very thick mud.
It has tyres that are much wider than usual and the position is very sporty.
The fat bike isn’t designed to do thousands of kilometres on the road, but instead for sporting activities in the heart of nature. Therefore, the advantage of using a fat bike while travelling is to get to the heart of nature in areas that pose a challenge. Between two different steps in the wild, the long-term traveller usually takes their bike on public transport.
You can adapt your fat bike for bivvying (sleeping outside with improvised shelter). It can also carry heavy loads, like a travel bike, but an amateur fat-biker probably doesn’t want to hoard too many things on their bike.

Tandems are made to carry two people. Lately, they’ve become popular again. The tandem is a potential option for a long-distance trip, although it has far less pros than it does cons.

The recumbent bike is quite a strange bike that still isn’t very common. The rider is in a laid-back, reclining position and pedals horizontally.
A double wall rim is best for strength. A single wall rim would be too fragile and a triple wall rim too heavy. It has to be aluminium or even duralumin. Steel braking is poor in rainy weather.
The rim is drilled with holes (from 32 to 48) to put the spokes there. The more holes there are, the less risk there is of a buckled bike wheel. A wheel rim with 36 holes is a solid choice. If there’s a big problem, you’ll be able to replace it without too much trouble. Bear in mind that those with more holes are harder to find.
The valve must be an automobile valve type (such as Schrader), that’s the standard type these days.
Choosing the wheel rim width depends on that of the tyres. The most commonly chosen width is 26 inches.
With disc brakes, you’ll need specific rims.
Good handlebards should be multi-position or with bullhorns, covered with self-adhesive cloth tape (such as Guidoline) and shoulder-width apart. Likewise, the stem should be short and tilted upwards so you don’t have to bend down too much, the best would be an adjustable multi-position stem.
Stainless steel is a must. For strength, use 2 mm spokes with glued spoke heads. Remember to check the spoke tension regularly to prevent the wheel from buckling.
This is the central component of the wheel. The hub should be drilled with the same number of holes as there are spokes.
An internal-gear hub is a very specific type of hub that doesn’t use a derailleur. In fact, the gear change mechanism is sealed and waterproof. You can even shift gears while stationary and you won’t derail. The main flaw is that it’s extremely difficult to repair. Removing the rear wheel is complicated. And, above all, it’s very expensive and heavy. In a nutshell, if there’s a component failure (very rare), you’ll need to get a new one. The Rohloff model guarantees 100,000 km riding.
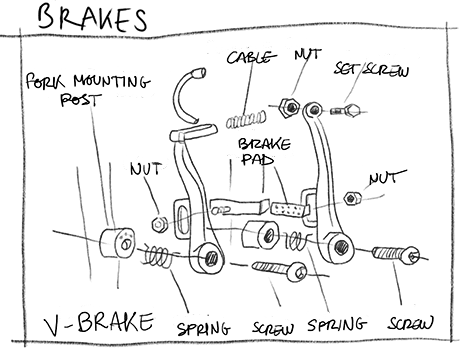
Cantilever or V-brake brakes are the traditional brake pads. They need to be regularly adjusted and maintained, but it’s easy. SwissStop brake pads (around $17) have a much longer life and work well in rainy conditions
Disc brakes. There are two types: hydraulic and mechanical. In both cases, they’re much more efficient than traditional brakes.
Hydraulic disc brakes are the best. They don’t require any maintenance. Unfortunately, they need technical knowledge and repair equipment that’s particularly difficult to transport. If something goes wrong on the road, it’ll be difficult to get out of it. However, while they’re very sturdy, there’s still a risk of an oil leak. But, with a good brand, this only happens very rarely.
Mechanical disc brakes are a little less efficient than hydraulic ones and they require maintenance. However, maintenance and repair are as easy as for V-brakes.
Watch out – for disc brakes, you need rims and a hub specifically designed for them.
Nowadays, the drivetrain case surrounds and protects the mechanism, axle and ball bearings. You slide it into the slot provided in the frame and that’s it. It rarely causes problems.
The vast majority of long-term bike-travellers opt for a triple chainset (22/32/42 teeth) in order to have a larger range of gears for different conditions. It’s always a good idea to be able to save some energy, and this can be done by using a lower gear ratio.
In this field, there are two schools. Automatic pedals attach your feet to the pedals. This gives you the best possible power output, but requires specialised shoes that have SPD (Shimano Pedaling Dynamics) cleats (with some models you can also walk in them). The traditional plastic toe clips are safer and pretty straightforward to use.
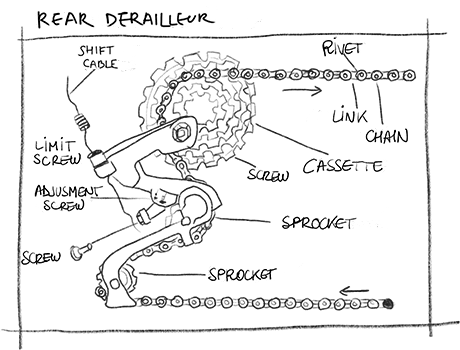
The chain you go for will depend on the number of cogs. Chains require frequent maintenance. A damaged chain prematurely wears out the teeth on the cogs and chainwheel. To guarantee the chain’s lifespan, you should ride carefully and start off with gentle gear changes, then gradually move into a comfortable position. You should also avoid crossing the chain too much, that is to say, placing it in the large chainring / sprocket position.
A classic derailleur is used by most travellers on long-distance trips, as you can change or easily repair them, and it’s certainly cheaper. The alternative to a derailleur is the internal-gear hub.
Aside from general wear and tear, the main risk is falling. With panniers, the derailleur is quite protected. Without panniers, the risk of damage is a little higher. However, there are derailleur guards. We recommend these guards and they don’t cost much at all.
There are twist grip shifters and thumb shifters. It’s purely a matter of taste.
Schrader valves (the car sort) are absolutely crucial.
You also always need rim tape to protect the inner tube. It’s important to always check that the pressure is okay, both for comfort and to avoid punctures and wearing tyres down prematurely.
Lighting on a bicycle is mandatory in many countries and it’s always a good idea to be visible, especially for safety reasons.
You can use battery-operated lighting, but that’s another thing that you’ll have to worry about. The best option is a dynamo light that is integrated into the bike’s internal-gear hub. As it’s sheltered from mud it works brilliantly and, the icing on the cake, you don’t feel any extra effort when pedaling, which is obviously not the case with traditional dynamos.
Note that nowadays dynamo lights can also charge electrical devices via a USB, such as smartphones, cameras, MP3s, etc.
What’s even crazier is that you can also store this energy in a battery to use for later. It’s also a good idea to have a front-facing light that you can add when going through difficult passages like tunnels.
SON hub dynamos are great, but cost more than $200 (£150). A good, middle of the range alternative is the Shutter Precision SV-8, which comes in at less than $120 (£100).
There’s a large variety of bike lights, from bog-standard ones to very high end ones (as strong as car lights).
When you’re about to spend thousands of hours in your saddle, you obviously want to be comfortable. So, you want to avoid nightmarish setbacks such as loss of sensitivity, impotence, prostate problems or even boils…
Opinions are divided, some go for a Brooks leather saddle which must be worn in over time. Others like really spongy seats or padded seat covers. Ergonomists recommend one type of saddle that postmen have adopted. This is the Proust saddle. This mobile saddle allows smooth pelvis motion which certainly shouldn’t, it seems, remain stationary. The nose of the saddle is short, unlike the usual long nose that presses in places it really shouldn’t. So, in theory, a saddle like the Proust would be the best option for your body. But, using it changes our habits. Therefore, it takes a little while to get used to it.
Comfort is highly influenced by good tyres. For a touring bike, we’d go for 26 inch tyres with a width of 35 to 45 mm that adapts well to the rims. You can easily find these tyre sizes. We advise you to get top-of-the-range, puncture-proof tyres.
You can bring foldable spare tyres to make sure you always have good-quality tyres to hand. On average, a decent tyre is changed every 10,000 km. To increase the lifespan of tyres, the front tyre and the rear tyre can be swapped regularly.
The Achilles’ heel of any bike-traveller! This isn’t really a problem when you’re riding a city bike or your grandma’s bike, because they’re not loaded with gear. When you add 60 lbs (30 kg) of luggage to a bike, you use the kickstand like never before. What’s more, lifting a loaded bike is tiresome.
A side kickstand is easy to kick out, but constantly breaks, even top-of-the-range ones. A central kickstand is a little heavy, but unbreakable. You need to lift the bike up slightly to use it.
Some use a simple broomstick as a stand that doubles up as an anti-dog stick in the event of a fierce attack.
Others add a kickstand on the front pannier rack to prevent the fork from rotating when stationary and add a support point.
You could always have two stands
A mileage counter will show you your speed and the number of kilometres covered. It’s not exactly essential, and it can sometimes be quite demoralising, but it still lets you know where you stand a little better.
Having a helmet is extremely important! It’s not easy to find a place to store it. There are bags that attach to panniers, so you can put them away easily and quickly. Ortlieb’s “helmet-holder” or “towel-holder” costs around $20 (£15).
Front and rear panniers racks must be made of steel so they can easily be re-welded if they’re damaged. To attach the racks, there are eyelets on the front fork and on the rear seat stay. So, no need to add mount points. You need to be quite flexible. To reduce vibrations, a trick is to place a rubber washer at the mount point.
For the front rack, if possible, try to get a model with a platform above the front wheel, which makes space for additional light luggage. You have to position the racks quite low and distribute the weight: two thirds in the front and one third in the rear. The racks should be able to support a load of at least 60 lbs (30 kg) each without showing signs of weakness.
If you’re not nearby, avoid leaving your bike unattended as much as possible. At least take off panniers and all small accessories. It’s a good idea to take a decent, thick D-lock, even if it’s heavy.
When camping, everyone devises their own little DIY alarm system with what they have to hand.
This is essential. We’d choose a bottle cage for big thermos bottles.
Mudguards are fragile. They get damaged very quickly and they often even cause problems. Mud builds up between the mudguard and the wheel. Some simply don’t use them or they adapt them so that they can be easily taken off on soft terrain.
As simple as it is useful, it can be handlebar-mounted or even helmet-mounted (particularly useful for recumbent bikes).
In some countries, a bell is compulsory. And in countries like India, traffic is controlled by the use of horns or bells. In a car, not having a horn is much more dangerous than not having indicators, and that’s saying something! You have to make sure it’s loud enough. The AirZound bike horn is as powerful as that of a car. It uses compressed air, which can be loaded again with a simple bike pump.
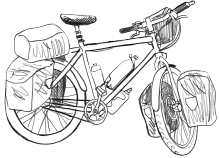
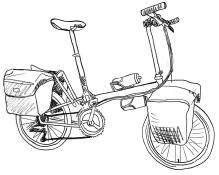
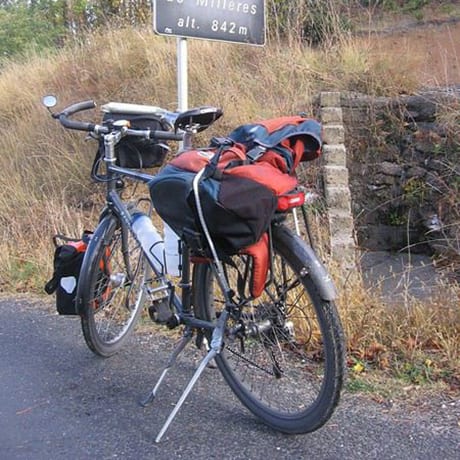
Most bike-travellers opt for panniers. You barely realise they’re there and it’s a good way to organise your gear. Each thing has its place and can be easily accessed.
If you want to have peace of mind, your panniers need to be waterproof as you’ll undoubtedly encounter some bad weather. Pretty often, bike-travellers put four panniers on their bike, two in the front and two in the rear, plus a small one on the handlebars, for the little things that you always want to have to hand, like a map or a camera.
On the rear panniers, there’s some room for a bag, which should also be waterproof. There aren’t very many brands that make specific panniers and bags for a long-distance bike trip. Ortlieb is the most popular.
For the right balance, put two thirds of the weight in the front.
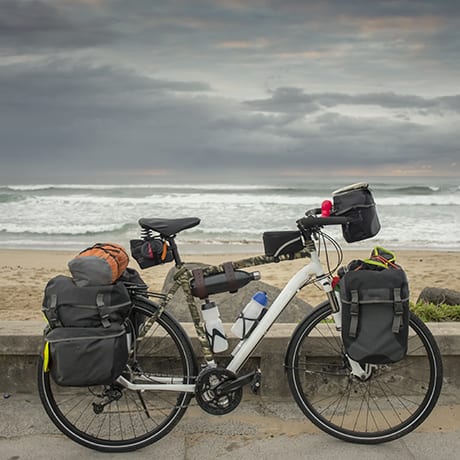
A bike trip with panniers
The alternative solution is a trailer. But this solution poses many more problems, as opposed to solving them. It’s very bulky and problematic when you need to use public transport (train, bus, boat, etc.). It’s extra maintenance, plus you run the risk of additional punctures and breakages.
The manoeuvrability of the bike also isn’t as good, particularly on uneven or rocky terrain. However, it’s a lot easier to get out of the saddle than with a bike kitted out with panniers. And, above all, you can make do with just one bag. Some models are fully removable.
It’s mostly used in very specific situations. For example, if you have to carry heavy loads or a child.
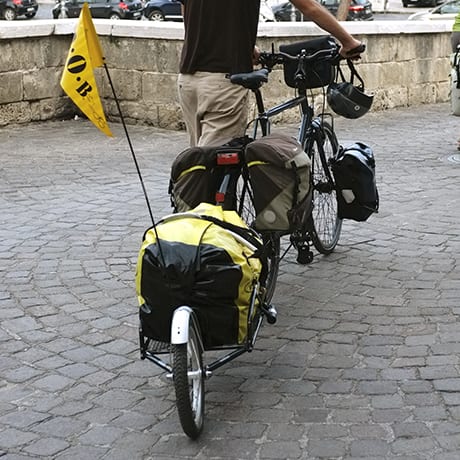
A bike with a single wheel bike trailer
You can even take your kids on a RTW bike trip! Depending on the age of your kids, we’d opt for one of the following solutions:
From the age of five, kids get a bit too heavy to pull in a trailer. Now is the time to consider a tagalong.
It’s half a bike that attaches to the back of a parent’s bike or a tandem. The pedalling system is detached. So, fortunately, the child doesn’t have to go at the same pace as the parent, and can even stop pedalling.
You can also add gears for the child.
If the kid is tall enough, another great solution is to put them in the rear seat of a tandem with the correct adjustments. If the kid is still too small, a good bike mechanic will be able to adjust the rear of the tandem.
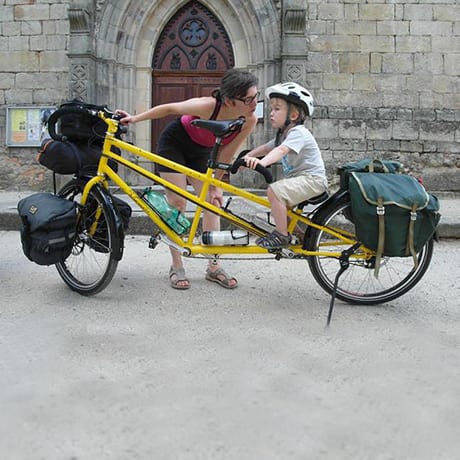
A tailor-made parent-child tandem
For a very young kid, this is the only solution. The trailer mustn’t be wider than the width of the loaded bike. For the little passenger’s comfort, it’s important to add shock absorbers. Parents recommend a trailer that can be opened at the back, so that the second parent, cycling at the rear on their own bike, can watch them.
From the age of seven or eight, some parents kit out a bike (mountain bike) specially for their child. They’re now independent and can even carry some of the luggage in panniers. Of course, you have to be extra careful. But by doing so, some families have managed to cover 25 to 30 miles (40 to 50 km) per day.
The FollowMe system lets you attach a kid’s bike to the back of an adult’s bike.
Unlike the tagalong system, the kid’s bike can be attached and detached very quickly. Therefore, a kid can ride alone on their own bike or attach onto an adult’s bike when they’re tired. This system is a lot better (more stable, simpler, more practical…) than the rival system: Trail Gator.
On a really long trip, you’re sometimes forced to use public transport. Anyone who travels light, with minimal luggage, is pretty happy to have made these choices.
As a general rule, it’s a good idea to put or check your bike in last to make sure nothing is placed on top of it. This is a particularly useful tip for when you’re on buses and trains.
You usually don’t encounter many problems on trains and boats. But, by plane, it gets a little more complicated.
Normally, you have to pack your bike in a standard cardboard box. Big airlines sell them, as well as some specialised bike shops (it’s cheaper). If you organise everything carefully, you can also put your panniers in the box.
Unfortunately, airlines’ maximum weight limit is quite low, usually around 45 lbs (20 kg). Above this limit, you’ll have to pay top dollar for every extra pound or kilo.
By plane, you have to deflate the tyres. It’s also a good idea to take off whatever can be taken off (panniers, pedals, handlebars, wheels…) to avoid breakages caused by careless luggage handlers, and to fit everything in the box properly.
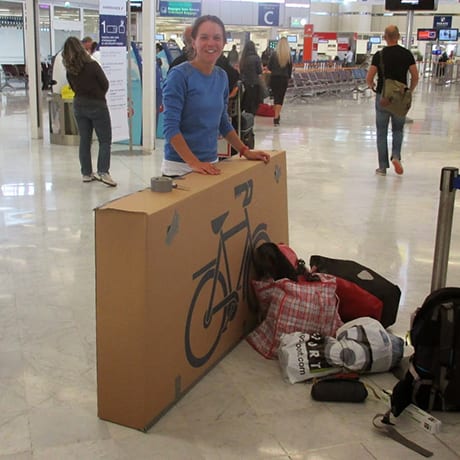
When travelling by plane, it’s usually compulsory to put your bike in a cardboard box
Crédit : voyageargentinelouise.blogspot.com
Technical failures inevitably arise. More often than not, the wheel is involved. To avoid problems as much as possible, cyclists should be careful and treat their bikes like a living being. Imagine that this is your horse! It must be respected, maintained and repaired regularly, sometimes preemptively. This prevents damage from occurring at the worst possible time. Of course, it’s strongly recommended to understand the mechanics of your bike inside out.
Rest assured, cautious cyclists very rarely encounter nightmarish problems.
On the road, almost everywhere in the world, it’s the rule of the strongest. Pretty often, the biggest, and the one who honks their horn first, can pass. In this ruthless world, bikes are hardly taken into consideration.
Always act according to local laws and customs. Observe other cyclists if there are any.
Finally, remind yourself that the roadside is a wonderful world – you don’t always have to live in the fast lane. You should use it as much as necessary.
Believe that a loud horn and strong lighting inspire respect.
Bike safety reflectors or flags are a great accessory to keep vehicles away from you. It’s quite simply a small bar, about 40 or 50 cm, that you attach perpendicularly to your bike. Nowadays, you can find adjustable ones or ones with reflectors for just a few bucks. For those who love a bit of DIY, there’s nothing easier to DIY.
On a bike, common minor injuries include: bum pain, sore muscles, sunstroke, tendinitis, blisters or even hypoglycaemia (low blood sugar)…
Don’t push yourself too hard, find the right position on your bike, take a suitable first aid kit, drink lots of water and know when to take a break.
In many countries, you can find packs of semi-wild, frankly aggressive, dogs. For some mysterious reason, bike-travellers seem to be their favourite target.
To protect yourself, there’s nothing quite like a little acceleration. But, sometimes, you’re not fast enough. Make sure you have a few stones and a stick to really defend yourself. Some add a nail to one side to make a more dangerous weapon that can be used as a last resort. You can apologise to Gwyneth Paltrow once you’ve saved your calves and avoided getting rabies.
This stick has a dual usage as it can also be used as a kickstand.
There are thieves in every country, both wealthy and poor. With a little luck, prudence and common sense, you won’t have any problems.
When camping, set up away from prying eyes, in a well-hidden area. Lock your bike up nearby and at least put the panniers containing valuable gear into your tent. Lots of bike-campers add a little DIY alarm system that will wake them up in the event of an attempted theft.
It’s best to not attract too much attention. Don’t talk about the value of your bike. Avoid displaying your valuable equipment.
In the poorest countries, border crossings can sometimes be a little complicated. From time to time, customs officers take advantage of their role to try and get a “tip”.
Try to anticipate the excuses they might come up with for asking you for money. It’s a good idea to take receipts for valuables, to prove that it’s not an illegal import or export.
Be wary of kids in a group, especially in Africa. As weird as it seems, several long term travellers told us that stone throwing is a relatively popular game and it can really hurt.
Planning your route, even loosely, is always a good idea when you’re going on a bike. You need to take several things into account: weather, traffic, altitude, elevation gain, road conditions and, of course, tourist stops.
The essential tool, to help you find your bearings and plan the distances of your trip, is a map.
Paper maps are a thing of the past. Phones killed them.
Gone are the days when hardy bike-travellers swapped their precious maps when they met in a hotel at the end of the world.
That said, even if people no longer use paper maps on a daily basis, many still use them to plan their itinerary as a whole, in a fairly comprehensive way. It still is, and always will be, much nicer to put a large national road map in the middle of a table to roughly plan a big trip (of several days, weeks or months), especially if you’re heading off with other people.
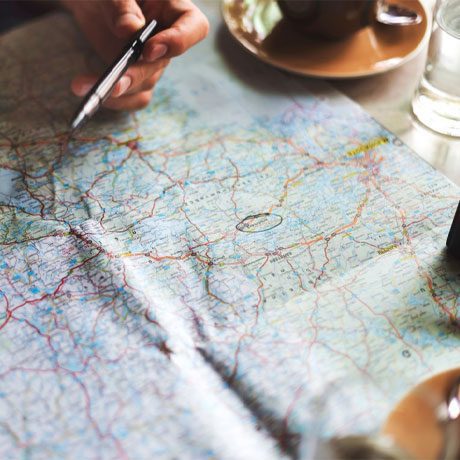
Nowadays, paper maps are useful for preparing your itinerary
Almost all long-term bike-travellers perfectly make do with their smartphone’s GPS. The best option is to pre-download maps on your favourite GPS app, using a good wifi connection or 4G. You’ll then be able to use the GPS without connection, which will massively help you save your battery-life and find your way in places where there isn’t even any signal.
Google Maps and Maps.me are the most popular apps. Both of them let you download maps to use offline. Maps.me is the most straightforward for this use.
These maps don’t weigh “too heavily” on your phone’s memory. A large area in the UK, such as Yorkshire (12,000 km squared), is around 300 Mo.
Unfortunately, the elevation gain either isn’t represented on Maps.me and Google Maps, or it’s too basic. If needed, there are also GPS apps more geared towards cycling, such as Komoot which gives more precise information on elevation gains or even the type of road surface (gravel, tarmac, soil, etc.).
These are pre-recorded tracks. Usually, you can download a GPX file of the track and import it into a GPS app (particularly on your phone). In fact, quite simply, the line of the journey is highlighted and superimposed on your GPS map. The 17 European cycling routes marked “EuroVelo” are downloadable in GPX files. Bike-travellers also sometimes share their GPX routes on their blogs. So, you can easily follow the same itineraries.
There are high-performance GPS apps (“for hiking”) that aren’t too expensive. They only prove to be useful when you’re off the beaten track, in the wilderness. These apps are specifically intended for serious hikers and, potentially, extreme bike-travellers, i.e. those who want to avoid roads as much as possible.
Adventure Cycling
:
Adventure Cycling is an ever-expanding community of bike-travellers. On their website, you can find inspiration for your next bike tour, advice on how to plan your trip and all sorts of bike-related tips. Whilst on the road, you can also benefit from their support. Not only do they encourage others to set out on a meaningful cycling adventure, but they also create opportunities for this. What’s more, they have a newsletter and magazine that you can subscribe to, as well as a podcast.
We Are Cycling
:
Starting out as the Bicycle Touring Club in 1878 for independent bike-travellers, We Are Cycling UK has evolved into a global network for cyclists, in particular, promoting the rights of cyclists on the road. On their website, you can find advice, videos, articles and guides on cycling, repairs and road safety. They even have a forum where you can post or ask any cycling-related questions. In addition, they list lots of cycling events and festivals that take place in the UK throughout the year.
Bikepaking
:
Bikepacking has all the latest information on bikepacking around the world. Take a look at their website to get inspiration, search different routes, read equipment reviews, find out about events worldwide, and much, much more! They’ve even created their own Bikepacking 101 Guide to gear you up for your first, or next, trip.
Facebook groups are a great way to find out information on a range of bicycle touring and bikepacking topics, from gear and technology to aches and pains. You can also ask questions to a community of well-travelled and knowledgeable bikers, who have lots of advice and recommendations, and meet other like-minded adventure seekers.
Some of the best groups at the moment include:
Ed Pratt :
Ed Pratt made a name for himself in 2015 when he set out to ride around the globe on a unicycle at just 19 years old. After finishing his first venture in 2018, he’s continued to undertake “alternative” adventures. Most recently, he’s been touring around the UK with his girlfriend… on a tandem! Check out his YouTube channel to find out more about his awesome adventures.
Wheels to Wander :
Wheels to Wander documents the cycling adventures of a young Dutch couple, Maudi and Eric, as they cycle all around the world, from Europe to Asia and beyond. Their videos really open all your senses and show you what cycling around the world involves, sometimes the low points, but mostly the epic experiences. You’ll undoubtedly be able to draw some inspiration from their wanders, and gain some tips and tricks along the way.
TandemWOW :
Catherine and Rachael, the two keen cyclists of Tandem Wow, cycled around the world from June 2019 to March 2020. But this wasn’t any normal RTW cycling trip, as they did it on a tandem, raised thousands of pounds for charity, and set a new world record. They’re officially the fastest women to circumnavigate on a tandem, completing it in just under 264 days. Check out their website to find out more about them and their route.
The Adventure Cycle-Touring Handbook :
Also known as the ACTH and, equally, the Bible of bike touring. This guidebook has hardy, long-term, world-travellers in mind. Right from the basics, such as essential kit, to the more detailed aspects of your trip, including very specific routes and plans, the ACTH has you covered on all fronts.
Basic Illustrated Bike Touring and Bikepacking :
Basic yet comprehensive, and filled with illustrations. This guidebook will inspire you to get out there, especially if you’re never bike toured or bikepacked before. It teaches you how to pick the right bike, choose suitable gear, pack all your gear on your bike, and figure out the best route for you.
How to Hit the Road: A Beginner’s Guide to Cycle Touring and Bikepacking :
If you’re a complete novice, this is the guidebook for you. It guides you, step-by-step, from the planning stages to actually undertaking a cycling adventure. What’s more, Tom has not only drawn from his own cycling experiences, but also those of over 50 other bicycle adventurers – so it’s pretty well-rounded!


