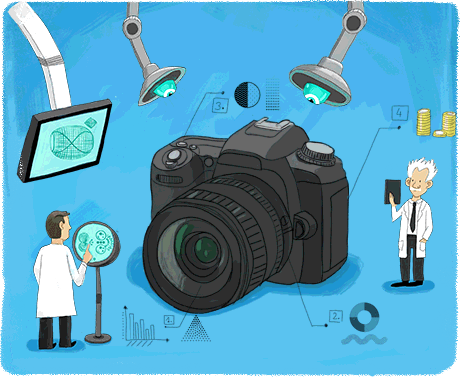
Given the impressive number of camera models, you may struggle to make your choice. In this article, we’ll go through all the criteria to take into account to choose one that’s right for you. To help you make sense of it all, we’ll also carefully compare the models most frequently chosen by round-the-world (RTW) travellers.
We carried out a large survey between 19th and 24th April 2023, amongst 1,212 people who had gone on a long trip. We asked them many questions about the devices they used to take their photos. Learn more about our methodology
Note: The total is greater than 100% because lots of travellers use more than one type of device.
Which devices should I take with me?
Think about how you intend to use the camera. The number and type of devices you bring depends on several factors:
Decide how much you are willing to invest in your device(s). This will help you narrow down your options and focus on the models that fit your budget.
Decide whether you’ll settle for a smartphone or invest in a camera. There are four types of cameras: mirrorless, reflex, compact and bridge cameras. Each has its advantages and disadvantages.
| Smartphone | Compact camera | DSLR camera | Mirrorless camera | Bridge camera | |
|---|---|---|---|---|---|
| Size | |||||
| Weight | |||||
| Battery life | |||||
| Powerful optical zoom | |||||
| Depth of field | |||||
| Profondeur de champ | |||||
| Low-light performance | |||||
| Responsiveness | |||||
| Interchangeable lenses | |||||
| Viewfinder | On some cameras |
||||
| Advanced settings | |||||
| Price |
Note : This table gives you a general overview. Don’t take it literally for all cameras, as there are significant differences within each category.
Compare the technical specifications of cameras : sensor size, ISO sensitivity, shutter speed, autofocus system, stabilization, etc. We have broken down the features of the main models for each camera type : Mirrorless, DSLR, compacts, bridges.
Nowadays, top-of-the-range smartphones have the same resolution as cameras. So, it’s completely legitimate to think twice about taking a camera that might get in your way and weigh down your backpack during a RTW trip.
93% of RTW travellers take photos with their smartphone during their trip. 46% of solo RTW travellers don’t take cameras (31% of travellers in a couple) and make do with a smartphone to take their photos. It’s a perfectly justified choice. Photo quality isn’t their priority. They prefer the comfort and flexibility of travelling light and tell themselves that, in any case, the memories of their trip will be engraved in their mind forever.
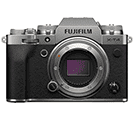
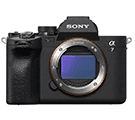
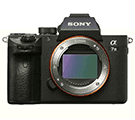
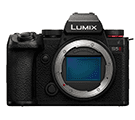
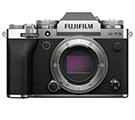
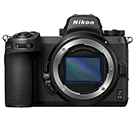
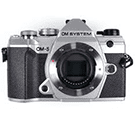
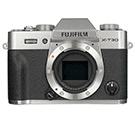
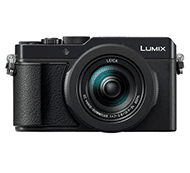
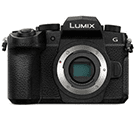
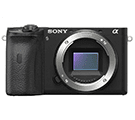
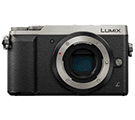
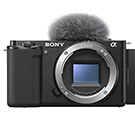
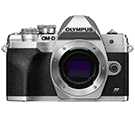
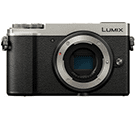
Mirrorless cameras, also known as “mirrorless interchangeable-lens cameras (MILCs)”, combine the advantages of compact cameras with those of DSLRs.
As with DSLRs, their lenses are interchangeable. If you choose a mirrorless camera, you will also need to select lenses according to the type of photos you want to take: panoramic, macro, and so on. Often, a lens is sold as a kit with the camera body, which is sufficient to get started.
As with compacts, they have an electronic viewfinder, i.e. without mirrors. So they’re less bulky that DSLRs.
Their sensors are bigger than those on compacts. The image quality, especially in low-light conditions, the selection of lenses, and the responsiveness when it comes to focusing and shooting are now equivalent to those of DSLRs.
This type of camera is also fast, making it easier to capture moving subjects. Their real added value is the ability to take photos in any lighting conditions and offer a great deal of creative freedom in photography.
Most of the new camera models today are mirrorless.

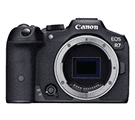
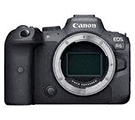
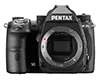
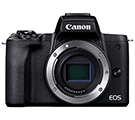
19% of RTW travellers take at least one mirrorless camera.
The most used mirrorless camera brands amongst RTW travellers are:
A mirrorless camera is the one for you if you mainly want to optimise the image quality to size ratio. Therefore, they’re a great compromise for long-term travellers.
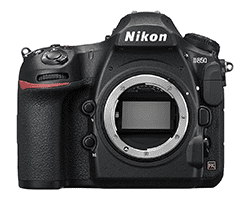
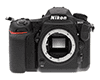
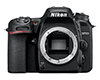
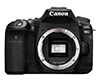
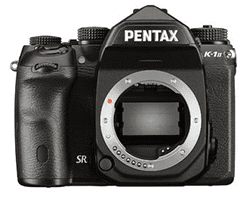
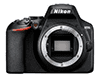
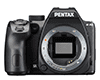
DSLR cameras consist of a body and an interchangeable lens system.
Unlike mirrorless cameras, DSLRs feature an optical mirror viewfinder.
DSLRs are quite heavy and bulky, which can be a constraint when traveling.
Canon in 2021 and Nikon in 2022 announced the discontinuation of developing new DSLR models. This type of camera is thus destined to make way for mirrorless cameras (except on the secondhand market).
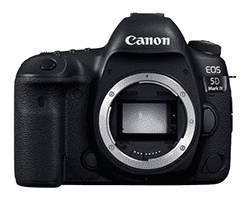
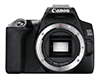
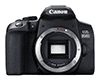
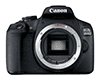
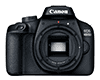
16% of RTW travellers take at least one DSLR.
The most used DSLR brands amongst RTW travellers are:
Manufacturers are abandoning DSLRs in favor of mirrorless cameras. Given the current level of photo quality provided by mirrorless cameras, the added bulk and weight of DSLRs are becoming difficult to justify. However, you can still find excellent DSLRs at attractive prices in the secondhand market.
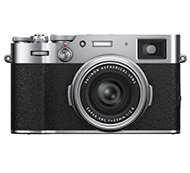
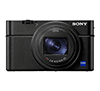
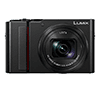
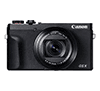
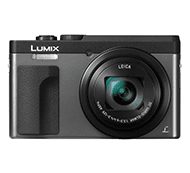
As their name suggests, compact cameras only take up a small amount of room in a backpack and easily slip in your pocket. They have a fixed lens, so you can’t change it for different uses.
They have relatively small sensors, so their performance is more limited than that of DSLR or mirrorless cameras. They’re less sensitive, and therefore don’t take as good quality photos in low light.
Generally speaking, compacts are less responsive. They take longer to shoot and are slower to focus, which increases the risk of blurring.
In comparison to other cameras, they’re less user-friendly, especially if you want to choose your own settings, and they don’t all have a viewfinder.
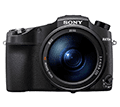
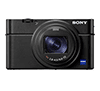
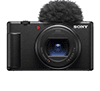
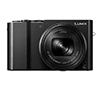
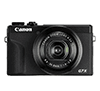
However, advanced compacts, like the Sony RX100, have larger sensors and manage to combine discretion with high image quality.
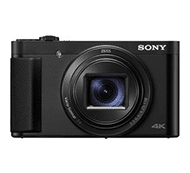
12% of RTW travellers take at least one compact camera (mostly advanced compacts).
The most used compact brands amongst RTW travellers are:
Forget about entry-level compact cameras that no longer offer much compared to good smartphones. However, compact cameras with at least a 1-inch sensor are well-suited for travelers who prioritize weight and discretion and don’t want to bother with settings and lens changes.
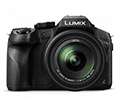
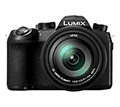
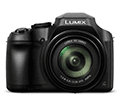
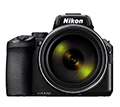
Although they may look like small DSLRs, bridges are actually more like compacts. They have a fixed lens. They don’t offer many settings and their lens quality is often pretty average. The main advantage of bridges compared to compacts is that they have a much more powerful zoom. Their size and weight are also much greater.
3% of RTW travellers take at least one bridge.
The most used bridge brands amongst RTW travellers are:
Bridges can be a good way to gradually move from compacts to DSLRs. However, being heavy and bulky, with lower image quality than that of DSLRs, we don’t recommend them for a RTW trip.
We can’t stress it enough: when doing a RTW trip, it’s better to travel light. A DSLR camera often weighs more than two pounds (one kilo) with the lenses. So it could make up more than 10% of the total weight of your gear!
For this reason, unless you’re a photo enthusiast or want to get serious about it, perhaps it’s better to opt for a compact or mirrorless camera, as they don’t normally weigh more than 10 or 14 ounces (300 or 400 grams).
When travelling, a big camera can quickly become a source of stress. The price of your camera is usually worth several months’ salary in the countries you’ll visit. It’ll stir up envy and attract unsolicited attention. In some countries, especially South America and Africa, you may not always feel comfortable getting out a large camera in front of everyone, particularly in big cities.
A smaller, more discreet camera is easier to get out to capture scenes from everyday life or during evenings amongst backpackers.
What’s more, on local buses where you already won’t have much legroom, you’ll have to keep it in a bag at your feet. A big camera will also hinder you when taking a plane because of the size and weight allowance of your carry-on luggage.
It’s still sometimes mistakenly seen as a decisive factor when choosing a camera. In reality, the only point in increasing the number of megapixels is to be able to make very large prints. All cameras sold today have a sufficient number of megapixels (at least 16) to make satisfactory enlargements.
However, a higher-resolution makes it possible to recompose a photo that was instinctively taken on the spot, without a suitable framing. You’ll be able to refocus it on a point of interest, zoom in on a detail, and all without compromising the image quality and sharpness.
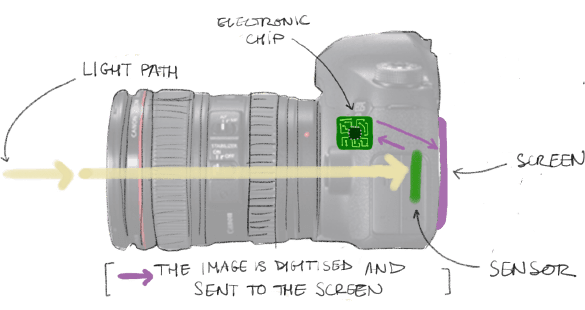
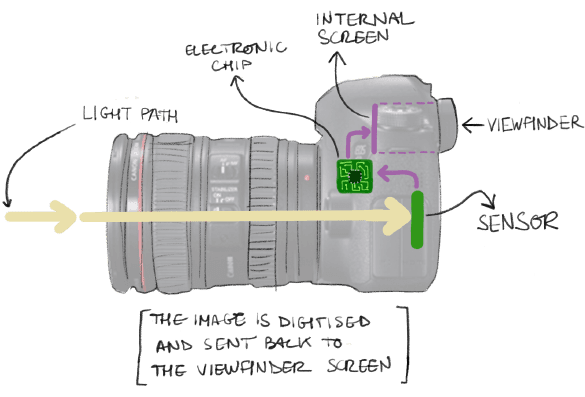
The sensor is one of the most important parts of a camera. It converts light rays into electrical signals which result in an image.
When we talk about the sensor size, we mean the physical size of the sensor, not the number of megapixels (see above).
A big sensor has three main advantages:
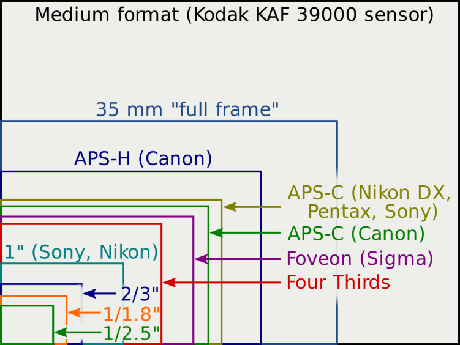
Different sensor sizes
From 1”, and especially from “Micro Four Thirds” (M43), the sensor size begins to be enough to make a real difference to a basic compact camera.
Sometimes it’s difficult to get your bearings with all the technical characteristics of lenses. So, here are the main aspects to take into account to help you make up your mind:
DSLR and mirrorless cameras have interchangeable lenses, unlike compacts and bridges.
The point of being able to change your lens is so that you can better adapt to each situation. Even without being a pro photographer, it’s easy to suppose that different lenses are needed to photograph an insect very close-up and a bird from very far away.
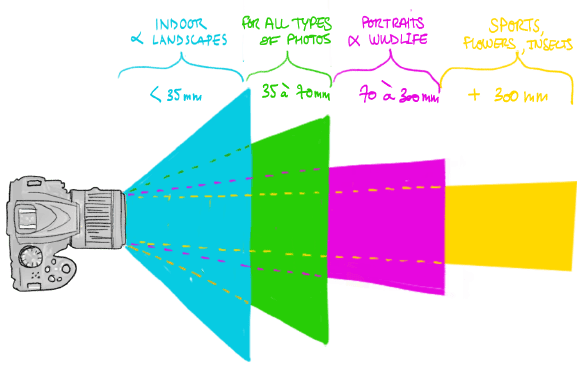
The focal length is stated in millimetres, for example 18-55 mm (zoom) or 50 mm (fixed focal length). It doesn’t measure the actual length of the lens, but gives an indication of how much your subject will be enlarged or reduced depending on what you see.
The greater the focal length, the higher the magnification. The shorter it is, the lower the magnification.
There are five types of lenses:
The most popular lenses amongst RTW travellers who took a DSLR are:
The most popular lenses amongst RTW travellers who took a mirrorless camera are:
Zooms are more versatile. They can be advantageous when travelling as you only need to use one lens for several purposes (portraits, landscapes…), so you can limit the weight of your gear.
Fixed focal length lenses are more compact and lighter than zooms, and they have a larger maximum aperture. Being technically simpler, they let in more light, which focuses on the subject better (whilst blurring the background).
Amongst the RTW travellers who took a DSLR camera:
Amongst the RTW travellers who took a mirrorless camera:
Optical zoom is the only real zoom. It’s the one that adjusts the focal length.
Digital zoom only artificially enlarges the image. Instead of saying digital zoom, we should really say “cropping”. Your camera’s software zooms in on your shot and stretches it out by duplicating the pixels to “fill in the gaps”, until the image goes back to its original size.
Although digital zoom can be a useful addition to optical zoom in some situations, in others, it lessens the image resolution.
Therefore, it’s more important to look at the optical zoom when choosing your device.
The zoom magnification is normally stated in the technical features of compacts, bridges and sometimes in those of mirrorless cameras sold with a lens (but not in those of DSLRs, as they only display the focal length of the lens). For example, a camera with 2.9x optical zoom and 11x digital zoom will magnify the subject up to 2.9 times optically and up to 11 times digitally.
Most zoom lenses have a variable aperture. The maximum aperture changes as you zoom. You’ll achieve the widest possible aperture when the zoom is at its widest possible setting.
Some lenses may maintain the same aperture over their entire zoom range. However, they’re pricier and heavier.
Fixed focal lenses also have a single maximum aperture.
The maximum aperture of lenses is stated in the following way: f/number(s). The smaller the f, the larger the aperture. For example:
A large maximum aperture has two advantages:
Large maximum aperture lenses are more sophisticated and therefore more expensive.
Interchangeable lenses only work within the same brand, not between brands. However, there are other brands, like Tamron and Sigma, that offer good quality compatible lenses at lower prices.
Image stabilisation technology reduces the blur that comes from the photographer’s movements (camera shake). However, it has no effect on the subject’s movements in your photo. These days, you’ll find this technology on most cameras. The longer the focal length used, the greater the stabilisation.
There are several types of image stabilisation:
With optical stabilisation, it’s the lens elements that move in the lens so that the image follows the movements of your camera. It’s usually a little more efficient than mechanical stabilisation and has the advantage of stabilising the viewfinder as well.
Canon, Nikon, Panasonic, Sigma and Tamron use this mechanism on some of their lenses.
With mechanical stabilisation, it’s the sensor that moves in order to follow the movements of the image. Its main advantage is that it’s built-in to the body of the camera and therefore works with any lens. On some devices, it also counters the rotation of the device.
Olympus, Pentax and Sony use this system.
It combines manual stabilisation and optical stabilisation, which means it can then compensate for five different movements: the pitch and yaw, the X and Y axes, and the roll (or Z axis).
Some device specs talk about digital stabilisation. Be cautious. This is usually a simple increase in ISO sensitivity. Others analyse the image to detect any blurring and correct it. The results are generally quite unclear and the image may even be seriously degraded.
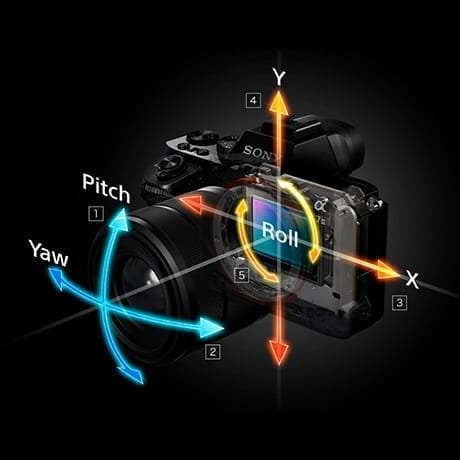
5-axis stabilisation
When we take a photo, we often need to capture a scene on the spot. So, your camera should be responsive enough. Responsiveness can be broken down into three parts:
Don’t underestimate the responsiveness factor, because if your camera’s too slow, you run the risk of missing lots of photo opportunities when the subject’s in motion: everyday scenes, animals, shows, and so on.
During your RTW trip, your camera will be really put to the test. It’s five main enemies are:
These kinds of damage aren’t covered by manufacturer warranties.
Manufacturer’s product manuals increasingly use the term “weather-sealed” to state that their models are resistant to solid objects and liquids.
Weather-sealed devices are equipped with several rubber seals that prevent water and dust from getting inside. The lenses, grips and flashes on DSLR and mirrorless cameras can also be weather-sealed.
But this name is more of a marketing term than an actual standard. It covers different situations from one brand to another. So it’s actually quite hard to know exactly what one camera can endure.
Diagram of Canon’s weather-sealing
Nonetheless, there is a rating for this type of protection, the IP rating (Ingress Protection), for example: IP68. The first digit tells you how well it’s protected (from 0 to 9) from dust (solid), and the second, how well it’s protected from water (liquid). If no criteria are met, the number is replaced by the letter X. You can find more info on the IP rating on Wikipedia.
However, it’s very difficult to guarantee the protection of cameras with interchangeable lenses (DSLR and mirrorless) as the body will inevitably be exposed when changing lenses.
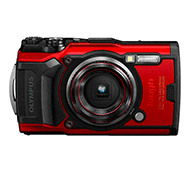
Therefore, in practice, this rating is only used for rugged, waterproof, compact cameras, specifically designed to endure extreme travel conditions. The Olympus Tough TG-6, which can withstand a drop of 6.9 feet ( 2.1 metres), is waterproof up to -49.2 feet (-15 metres) and can withstand temperatures down to 14°F (-10°C), is the benchmark for this type of device.
A camera’s battery life is measured by the number of shots. It’s usually better on DSLRs and bridges (bigger and heavier) than on compacts and mirrorless cameras.
Generally speaking, a camera’s battery life will be lower than that stated by the manufacturer, as they obtained it under ideal laboratory conditions. You should count yourself lucky if you get 75% of the displayed battery life.
Optimised use will help you make your battery last longer:
You can also take one or more spare batteries in order to further increase its battery life (but also its weight).
It’s pretty difficult to do without the viewfinder if you want to accurately frame and compose a photo: get rid of distracting objects, add lines or a grid, or highlight the subject.
Nowadays, there are three types of viewfinder (the “tunnel” viewfinder having almost completely disappeared) which each have their advantages and disadvantages:
It’s made up of a set of mirrors that send the image back to a flat sheet of frosted glass. The first mirror is mobile, to direct the image either towards the sensor or towards the frosted glass. Shooting and aiming arer therefore in two distinct positions, so you can’t do both at the same time.

Advantages:
Disadvantages:
All digital cameras have a screen, usually an LCD one. On compact cameras, it’s the only aiming system. It works like a video camera that films and displays the image in real time, without recording it.
Advantages:
Disadvantages:
It’s a small screen or a projector that is positioned just behind the eyepiece. It’s usually thought to be less precise than an optical viewfinder, but some recent, high-definition models let you aim very easily.
Advantages:
Disadvantages:
Nowadays, automatic mode comes on all cameras. However, if you’re an experienced user or you want to learn about photography, your camera needs to have precise settings on:
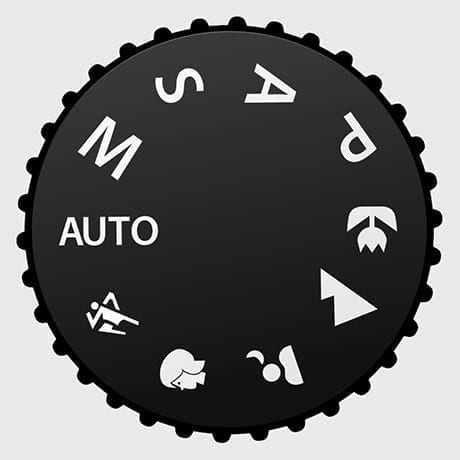
PASM creative modes
Aside from low-end compact models, you can use PASM creative modes on most cameras:
You can access these modes via a thumb wheel or via the menu. Selecting via the wheel is faster. More info on creative modes in this article on the ImprovePhotography blog.
When you take a photo, your sensor records the raw information it captures. Your camera will then process this information (white balance, contrast, saturation, sharpness, noise reduction) according to the settings you’ve defined, and save it as a JPEG image file.
However, more and more cameras also allow you to shoot in a RAW (or RAW + JPEG) format. All data recorded by the sensor are then saved as RAW files on your camera.
You won’t be able to directly use your photos saved in a RAW file (but there is software that allows you to view the data as images). After shooting, you’ll have to go through a post-production editing process (digital development), with Lightbox-style software or a Manual-style app on a smartphone, to adjust the RAW file.
So, you’ll have to travel with a laptop, unless you wait until you get back to go through the post-production editing process.
You’ll then be able to change the brightness, colour tones and contrast as you see fit, without loss of detail or quality, before saving them in an image format (JPEG, TIFF, etc.). Shooting in raw therefore takes more time, but gives you way more freedom to express your creativity.
Some cameras have two memory card slots. If this is the case, you can shoot in RAW on one card and in JPEG on the other.
Note: RAW files don’t end in .raw, their extension differs depending on the brand: .cr2 for Canon, .nef for Nikon, .arw for Sony, and so on.
Most recent camera models allow you to shoot in Full HD (1920 x 1080 pixels).
Some models now support 4K (or UHD) which offer more detail, precision and clarity. 4K video also has the advantage of allowing you to crop. This is particularly useful for stabilising your image in the post-production editing process, since the software doesn’t need to insert pixels.
However, due to the volume of data to be stored, 4K requires a lot of storage space and a high-performance computer if you plan on video editing.
Beyond definition, several other factors should be considered when choosing a camera with good video recording performance:
You could also consider buying accessories to further enhance the quality of your videos:
These days, most cameras have USB2 and HDMI ports so you can transfer to computers and connect to TVs.
The development in photography on smartphones means that we’re used to getting good connectivity which, it must be said, makes our lives much easier. This is why more and more devices are now wifi-connected. They allow you to:
Each brand has its own Android and iOS apps to connect to the device and transfer images.
Some cameras also offer bluetooth connectivity, which is less energy-guzzling. This is particularly the case with some Nikons, via their Snapbridge app.
NFC is another communication technology that some devices have. To connect two devices via NFC, they must be placed within 1.6 in (4 cm) of each other, and then the images can be sent via wifi.
GPS can be a handy option for travellers. It lets you automatically geotag your photos to quickly know where they were taken. Few cameras are equipped with it as standard, but it’s often possible to add it as an option. Whether it’s included from the start or not, keep in mind that when your GPS is on, your battery will drain faster. So don’t use it when you don’t need it.
Camera manufacturers sometimes continue selling the old versions of their models. If so, you’ll therefore see several versions of the same model coexisting. You can usually identify each model by looking at the word “Mark” plus a number, or just the Roman numerals. For example, the third version of the Sony RX100 can be written as:
Pay careful attention to the version when buying a camera, as the price can double from an old model to a recent model, with distinct differences in terms of the product.
We compared the 60 most used camera models by long term travelers. We also included some cameras that are too recent to be included in our survey but are among the best sellers.
The average score is calculated based on the ratings provided by the following websites: Amateur Photographer, Camera Jabber, Camera Labs, Camera Race, Digital Camera World, Cnet, DP Review, PCMag, Photography Blog, Tech Radar, and Versus.
These ratings are based on the evaluation at the time of the camera’s release. For older devices, the score may be slightly inflated due to the technological advancements of competing devices.
SD cards are by far the most common. You’ll see one of these three acronyms:
There are also higher performance CF cards, but they’re only used with top-of-the-end and professional DSLR cameras.
The number and storage capacity of memory cards you’ll need depends on:
The MemoryCardCalculator website can give you an idea of how many photos you’ll be able to store on your memory card.
The storage capacity you’ll need also depends on the device you’re going to transfer them to. If you travel with a big hard drive, you’ll need fewer memory cards than if you were to travel without a storage tool.
But in practice, it’ll often be tricky to store your photos on a cloud, due to slow connectivity in lots of countries. Another good solution to avoid losing all your photos, in the event of loss or theft, is to regularly send SD cards with a copy of your photos back home by post. Save them on an external hard drive as well, in case the postal service loses your memory card.
The writing and reading speeds of the memory card are also criteria to take into account when making your choice. You can learn more about memory cards on this article from the Contrastly website.
A tripod offers several advantages:
It should be compact and lightweight so it doesn’t get in your way or weigh you down during your trip. Avoid steel tripods (too heavy) or plastic ones (too fragile) and instead go for aluminium or, even better, carbon.
Other factors to take into account when making your choice are: the maximum load (which depends on the weight of your device), the maximum height and the minimum height.
GorillaPod tripods are extremely popular amongst RTW travellers. They’re really compact and lightweight and their flexible legs allow you to secure them almost anywhere.
If you’re using a DSLR or mirrorless camera on your trip, it might be a good idea to pack some filters. The most commonly used filters amongst RTW travellers are:
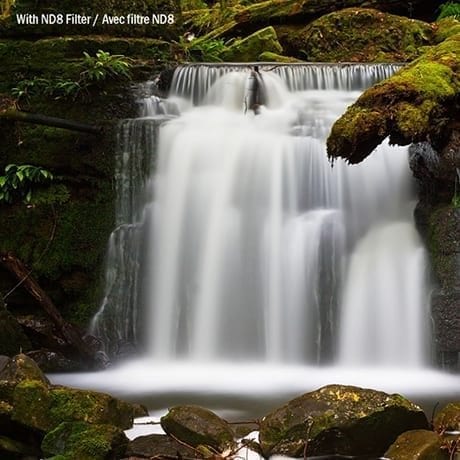
Steamy, misty water effect achieved thanks to a neutral-density filter
When you take a plane or bus, never put your camera in the hold. It may be damaged or stolen. You must take it with you, either simply in its case inside your small travel daypack, or in a specially-designed backpack (mainly if you’re travelling with a DSLR).
There are some with a removable photo compartment or with a back opening, for more security. We don’t recommend messenger bags (that go across your body), as they’re too bulky for a long trip.
If you intend on diving on your RTW trip, there are waterproof cases that allow you to use your camera underwater. These cases are fully waterproof thanks to rubber seals and can come with flash.
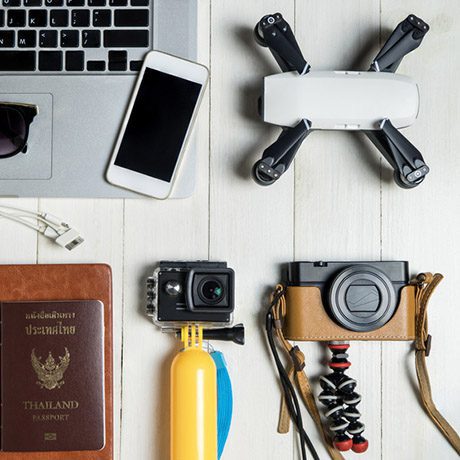
Some travellers, particularly bloggers, take a drone to be able to film, but also to take photos from the sky. However, they’re a significant additional investment and weight.
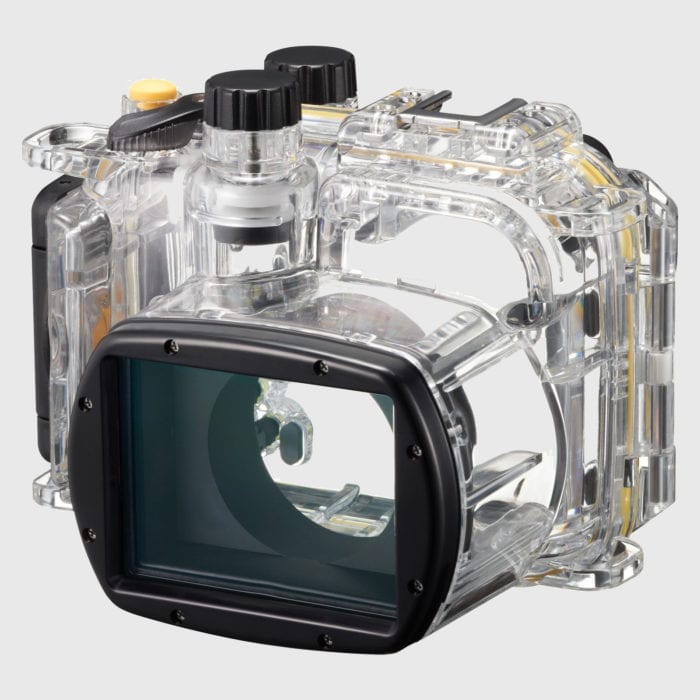
Canon WP-DC48 waterproof case
Most travel insurance covers luggage and therefore your camera. However, they don’t usually insure valuables above a certain amount. This limit varies a lot. It can range from $250 to $2,000 (£200 to £1,500) depending on the insurance.
We’ll write a specific article on travel insurance soon.
What’s more, travel insurance covers damage or loss by your carrier and theft by breaking and entering or attacking, but not the loss or breaking of your camera.
If you’re travelling with a valuable camera, we advise you to take out specific insurance.